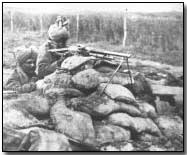
Battles - The Battle of the Wadi, 1916
 The first attempt to relieve
Sir Charles
Townshend's beleaguered force
under siege by the Turks at Kut-al-Amara had
ended in costly failure at
Sheikh Sa'ad.
Pushed however by regional British Commander-in-Chief
Sir John Nixon,
General Aylmer was obliged to rapidly launch another attempt within a week of
Sheikh Sa'ad.
While Aylmer was developing a somewhat sceptical view of his prospects of successfully relieving Kut, Nixon had no such doubts. He believed that Aylmer's force of 10,000 men, added to Townshend's 10,000 in Kut, would prove sufficient to break the notoriously unreliable and ill-disciplined Turkish army.
However such primitive if confident calculations overlooked the reality that Khalil Pasha - the local Turkish commander - not only led a similar number of troops in the area (20,000) but could also call upon a further 30,000 stationed in nearby Baghdad, with yet more on the way.
Moreover the prospects for any force moving up the Tigris River were unpleasant during the months of February and March, when floods were the norm, severely hindering progress.
In spite of the heavy losses sustained at Sheikh Sa'ad Aylmer had nevertheless advanced some 9km further upstream towards Kut, when - inexplicably - defending Turkish forces under Nur-Ud-Din had abandoned their lines and begun retreating. Nur-Ud-Din's dismissal and consequent replacement with Khalil had however brought a halt to the Turkish retreat.
 Consequently
new and firm defensive positions were established on the banks of the Wadi,
through which the British would necessarily have to pass en route to Kut.
Aylmer, aware of Khalil's movements (in spite of a lack of accurate maps of the area), proposed to outflank the Turks and secure possession of the Hanna Defile immediately behind the Turk lines, thus surrounding Khalil's forces. Meanwhile a frontal attack would also be launched by 28th Brigade while the remaining British forces moved around the Turkish flank.
Aylmer began operations on 13 January 1916. Initially intended to begin during early morning the attack was delayed pending dissipation of a morning mist. However this took rather longer than anticipated, until almost 1pm; meanwhile Aylmer's artillery laboriously crossed the Wadi in readiness to shell the Turk positions.
Meeting little opposition, at least initially, British infantry advanced in thin numbers. So thin indeed that in many places the British advanced directly past Turkish posts, exposing themselves to withering fire from behind.
Quickly becoming bogged down as the element of surprise was lost - 28th Brigade's frontal attack was entirely repulsed - and forced to deal with the unusual circumstances of having to defend from behind, the British advance rapidly slowed. Now aware of British plans Khalil's force swiftly redeployed from a north-south facing position to east-west to avoid being outflanked.
The attack was called off by Aylmer as the day closed. Despite having secured control of the Wadi the Turks remained in thorough command of the Hanna Defile. The gain was small and unworthy of the 1,600 British casualties incurred.
Click here to view a map charting operations in Mesopotamia through to 1917.
Photographs courtesy of Photos of the Great War website
"Harry Tate" was the nickname given by British pilots to the R.E.8 aircraft
- Did you know?
